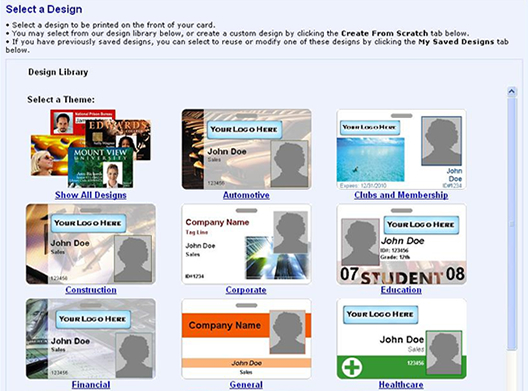
To get started, click the "Start Badging" button on Photo-badge.com’s home page. Next, select a predesigned template from the Design Library. There are over 100 different badge templates, which fall into more than a dozen different categories (construction, medicine, education, retail etc.). The template you choose determines what the card will look like. It determines the card’s color, what information goes on it, the size of the text, if there will be a logo etc. Once you choose a template, you can reuse it to make multiple different IDs with the same layout and design. In other words, you can input different people’s information into the same template to make matching ID-badges. This is a great and efficient way to make ID’s for an entire office, a school, or any other group of affiliated people.
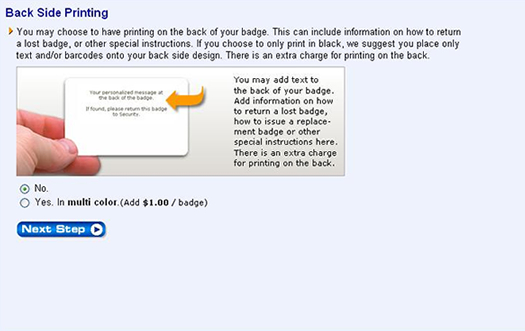
Once you’ve chosen a template from the Design Library, you can choose to print on one or both sides of your ID. The back of your ID-badge is a great place to include information that you think is important but would add clutter to the front of your badge, like instructions on how to return a lost ID. If you choose to print on both sides you will be asked to pick a design for the back of your badge in the next step. Once you’ve made your choice, click "Next Step."
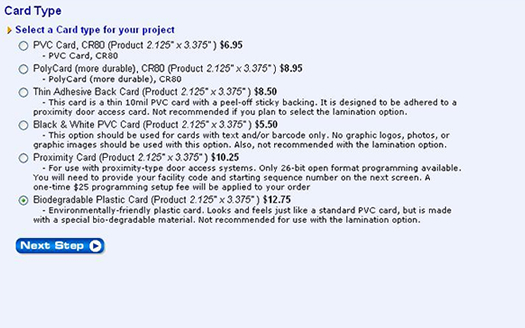
Next, you’ll be asked to select a card type for your project. There are six different types of cards to choose from, and depending on what you’ll be using your badge for, some are better than others. Once you’ve read through the different options and made your choice, click "Next Step."
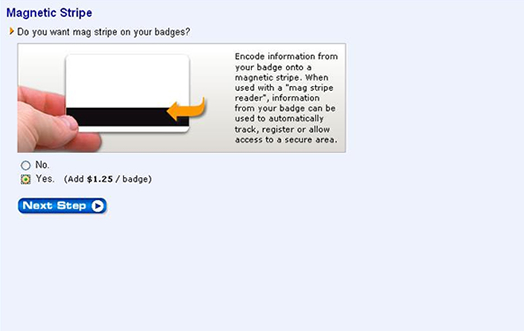
You can also choose whether or not to include a magnetic stripe on your ID-badge. A magnetic stripe allows you to store over two hundred characters of encoded information. Information stored on a magnetic stripe can be read by a "mag stripe reader" and used to automatically track the card holder or provide him or her with access to a secure area.
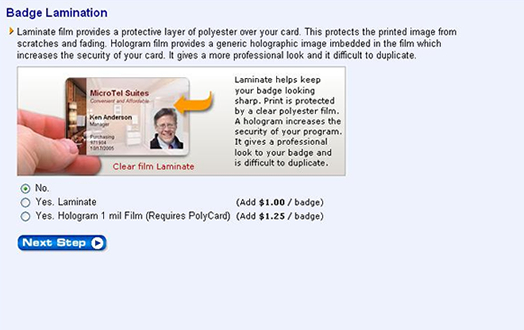
Next, you’ll be given three options for lamination. Choose between no lamination, lamination, and lamination with a hologram. Lamination helps keep your badge looking new by protecting its surface from scratches, and A hologram makes your badge harder to duplicate and more professional looking.
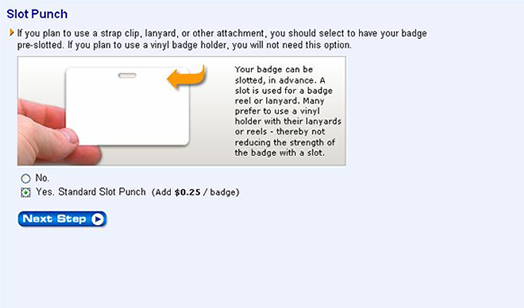
If you plan to use a strap clip, lanyard, or other attachment, you should choose to have your badge pre-slotted. If you think you’d rather use a vinyl holder for your badge, then a slot punch won’t be necessary.
Now we get to the important part: editing your template. This part of the process allows you to make changes to the template you chose earlier. You have the ability to add, edit, move, and resize objects (text fields, photos, graphics, etc.) on this page.
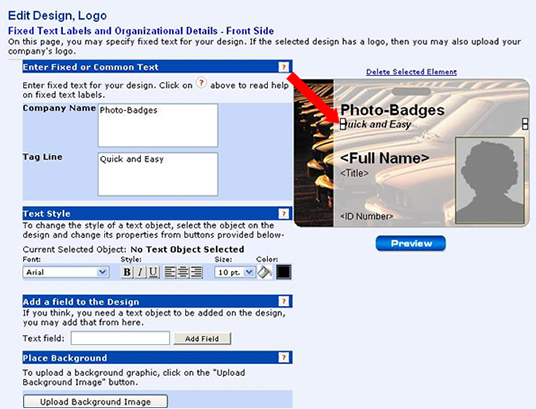
To move an object, select it by clicking on it with your mouse. Then, while holding down the left-click button, drag it to where you want it. You can move text fields, images, logos and any other objects from the template. To resize an object, click on it with your mouse. Then, left-click and drag one of the corners to make the object larger or smaller.
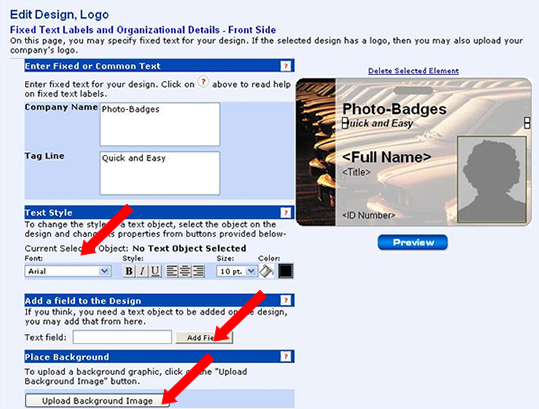
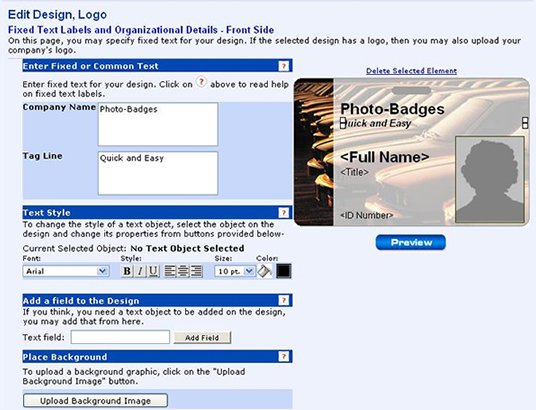
If you want to edit a preexisting text field, select it by clicking on it with your mouse. Then, you can change the font size, orientation, color. etc using the "Text Style" tools to the left. Later, when you input information into that field, the information will appear according to your specifications. You can also add new text fields to the template. Type in a name for the field and click "Add Field." Remember, the name of the field will not appear on your final badge, it will be replaced by the information you input later.
Certain card designs contain fixed or common text. Fixed text is text that will appear on every card made with that template. For example, if you are making ID-badges for an entire company, you might want your company’s name to appear on all the badges. As a result, there are a number of badge templates that have a fixed text field for "company name." By entering your company’s name into a fixed text field, you save yourself the trouble of having to reenter it every time you make a badge for someone new.
You can also choose to upload a logo or a graphic To do so, click on the "Place Logo" button and select the logo/graphic that you want to upload. Once it appears on your badge you can move it and change its size. The logo will appear on every badge you make using this template.
Similarly, you can upload a background image by clicking the "Upload Background Image" button. Finally, you can preview your design by clicking on the "Preview" button. Since, web browsers display text and images at a slightly smaller size than what will actually appear on your finished printed card, it’s important to preview your design, so you know exactly how your card will look once it’s printed, paying careful attention to how the text looks. Once you’re satisfied with the design of you template, click "Next Step."
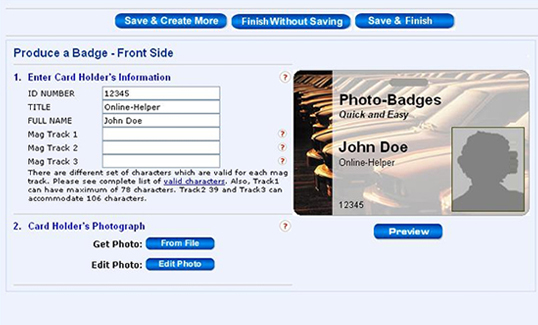
At this point, you will be asked to input the information that you want to appear on your badge. Fill in the fields that appear on your screen with the appropriate information. You will also be asked to provide a photo for your badge. You can upload a photo from your computer and use the "Edit Photo" option to crop it and touch it up. Once you’re done adding your photo and your personal information, click "Preview" to see a preview of what your badge will look like. Then, click "Save & Create More" if you want to make more badges from the same template, or click "Finish Without Saving" or "Save and Finish" to place your order. It’s always a good idea to save, in case you want to use the same template to make badges in the future.
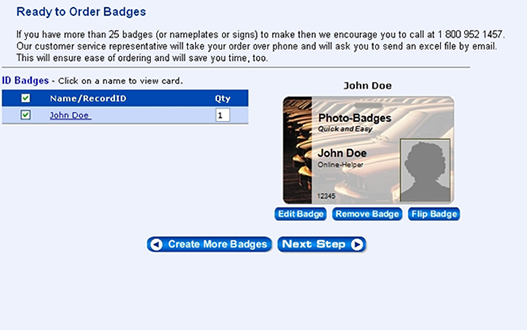
The last step is checking out. Once you add your badges and accessories to your cart and check out, you will receive your purchased items according to the shipping method you selected during checkout.